
- English
- Español
- Português
- русский
- Français
- 日本語
- Deutsch
- tiếng Việt
- Italiano
- Nederlands
- ภาษาไทย
- Polski
- 한국어
- Svenska
- magyar
- Malay
- বাংলা ভাষার
- Dansk
- Suomi
- हिन्दी
- Pilipino
- Türkçe
- Gaeilge
- العربية
- Indonesia
- Norsk
- تمل
- český
- ελληνικά
- український
- Javanese
- فارسی
- தமிழ்
- తెలుగు
- नेपाली
- Burmese
- български
- ລາວ
- Latine
- Қазақша
- Euskal
- Azərbaycan
- Slovenský jazyk
- Македонски
- Lietuvos
- Eesti Keel
- Română
- Slovenski
- मराठी
- Srpski језик

How to Install a Metal Cable Gland Properly for Maximum Durability
2025-08-18
If you’ve ever struggled with loose connections, poor cable management, or corrosion in harsh environments, you know how crucial a Metal Cable Gland can be. With over 20 years of experience in electrical installations, I’ve seen firsthand how the right cable gland can make or break a system’s reliability.
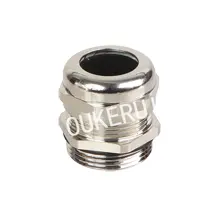
At OUKERUI, we specialize in high-quality Metal Cable Glands designed for industrial, marine, and hazardous locations. Today, I’ll walk you through the proper installation process, highlight key product features, and explain why choosing the right gland matters.
What Tools Do You Need to Install a Metal Cable Gland
Before starting, gather these essentials:
-
Adjustable wrench (for tightening)
-
Cable stripper (if preparing wires)
-
Thread seal tape (for waterproofing if needed)
-
Screwdriver (for securing locking rings)
-
Anti-corrosion spray (for outdoor applications)
Using the right tools ensures a secure fit and prevents damage to the Metal Cable Gland or cable.
How to Choose the Right Metal Cable Gland for Your Application
Not all Metal Cable Glands are the same. Here’s what to consider:
| Feature | Why It Matters | OUKERUI Recommendation |
|---|---|---|
| Material | Stainless steel resists rust; brass offers conductivity | Our 316 stainless steel glands excel in corrosive environments |
| IP Rating | Determines water/dust resistance | Choose IP68 for waterproof sealing |
| Thread Type | Must match your enclosure | Metric (M) or PG threads available |
| Cable Diameter | Too loose = poor seal; too tight = cable damage | Measure your cable’s outer diameter precisely |
OUKERUI’s Metal Cable Glands come in multiple sizes and certifications (ATEX, IECEx) for hazardous areas.
Step-by-Step Guide to Installing a Metal Cable Gland
1 How Do You Prepare the Cable
-
Strip the outer sheath (if required) without damaging inner wires.
-
Ensure the cable diameter matches the gland’s specified range.
2 What’s the Correct Way to Assemble the Gland
-
Slide the nut and sealing ring onto the cable.
-
Insert the cable through the gland body.
-
Tighten the compression ring evenly with a wrench—avoid over-torquing.
3 How to Secure the Gland to the Enclosure
-
Apply thread sealant if waterproofing is critical.
-
Hand-tighten first, then use a wrench for a final ¼ turn.
Pro Tip: OUKERUI’s Metal Cable Glands feature a double-lock design to prevent loosening from vibrations.
Why Does Proper Installation Matter
A poorly installed Metal Cable Gland can lead to:
✔ Ingress of moisture (causing short circuits)
✔ Cable slippage (risking disconnections)
✔ Corrosion (reducing lifespan)
OUKERUI’s precision-engineered glands minimize these risks with:
-
Knurled surfaces for better grip during installation.
-
EMC shielding options for sensitive electronics.
Where Can You Get Reliable Metal Cable Glands
If you’re tired of generic glands that fail under pressure, OUKERUI’s Metal Cable Glands are built for durability. Whether you need explosion-proof ratings or marine-grade stainless steel, we’ve got you covered.
Contact us today for a customized solution—let’s make your next installation hassle-free!